A light bar on your Jeep provides that extra light you sometimes need on the trail or on the road. We decided to add an LED bar to the jeepfan.com JK and with the help of Extreme Terrain we chose a Raxiom 50″ Double Row light bar and a set of Lifetime JK mounting brackets. In addition to the hardware a Raxiom Lighting Wire Kit completed the parts list.
Continued from Part 1 – Wrangler JK Light Bar Installation
Wiring it up
Wiring accessories on a JK always proves an adventure. On the inside the dash is so tightly assembled making sneaking wires around a challenge and finding a wire to tap into for power is just as difficult. On the engine compartment side there is minimal room and finding an ideal location for items is almost as equal of a challenge as the inside.
Light Bar
The directions indicate running the wire down the inside of the bracket..we couldn’t get it to work. The wire lead from the bar is very thick and prevented the bracket bolts from threading. We decided to neatly run the wire down the windshield side of the bracket and secure it using some silicone adhesive.

To get the wiring under the hood we removed the two bolts that hold the upper cowl panel and snaked the wires underneath. Note: keep the wires to the rear and make sure there is no chance for the wires rubbing. Luckily the panel has flat edges so the install is clean.
A small problem we ran in to is the bar’s wire is about 1 foot too short. This caused the wire connection to the harness to be exposed outside of the Jeep. We cleaned up the whole installation with some plastic wire loom.
[ezcol_1half]

[/ezcol_1half] [ezcol_1half_end]

[/ezcol_1half_end]
Engine Compartment
Once we got the wire securely into the engine compartment we need to find a place to mount the included relay. We used an empty hole next to the battery. With that complete we connected the positive and ground wires to the battery. In our installation we chose to wire the light direct to the battery so that we could control when the light is on even if the Jeep is off.
[ezcol_1half]

[/ezcol_1half] [ezcol_1half_end]

[/ezcol_1half_end]
With the engine compartment complete we needed to get the wire inside…next challenge.
Inside
In this install we removed the Jeep’s glove box which is easily done by squeezing in on the rear sides of the box when open. Behind the box is mostly HVAC stuff and there is a small patch of exposed firewall. We drilled a small hole directly above the bolt near the battery. We then installed a small grommet and passed the switch wire and a positive lead through the grommet.
[ezcol_1half]

[/ezcol_1half] [ezcol_1half_end]

[/ezcol_1half_end]
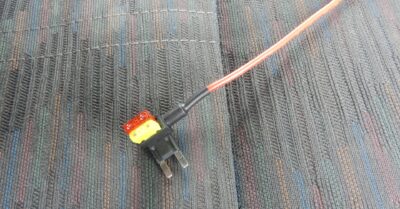
We installed the switch in a convenient location and used the self adhesive back to stick the switch to the dash. After completing the wiring test operation and clean up all the wiring to prevent rubbing. The wire kit does include some extra wire ends and lengths. It’s optional to trim down the wiring for a cleaner installation.


